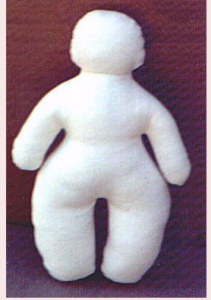
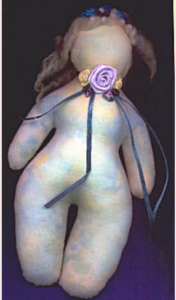
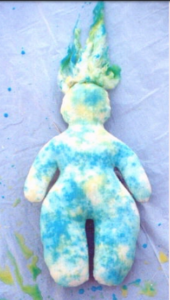
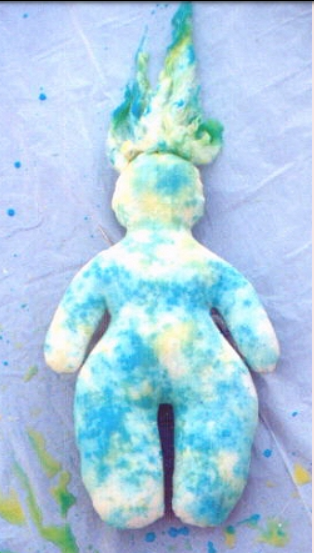
This pattern works well for an Earth Goddess or Fertility Doll, too!
You can print these instructions, or save them to your computer by clicking on “File/Save” in your browser’s tool bar above. Then right click on each image below and save each image, too. When you are offline, open your browser (choose “work offline” if it asks), click on “File/Open” and choose this page. You can then read the instructions as you go.
Print the sewing pattern, too, of course. Check scale marks (1″/cm) and resize if needed.
SUPPLIES:
12″ x 18″ rectangle woven fabric such as muslin
several locks of washed wool, uncarded, or yarn or hair fiber of choice
flavored drink mix, 2 or more packets each flavor (color) desired
vinegar (optional)
squirt or spray bottles, 1 per color of drink mix
crystals, beads, charms, ribbons, etc. as desired
tacky glue or glue gun
pencils or markers (optional)
lightweight cardboard or plastic template material
SUPPLY NOTES:
I used plain muslin in the doll pictured. You can use any woven fabric, as desired. Choose appropriate prints, fabric you have dyed, etc. – whatever strikes your fancy! If you are making the doll for yourself, use the piece of fabric you just can’t bear to get rid of, or the one you can’t really afford but just had to buy!
When using flavored drink mixes to dye fabric, use at least 2 packets per ¼ cup water (directions will follow). Pale colors such as yellow require up to 5 or 6 packets for a bright shade. Experiment on scraps of fabric to get the shade you want.
For squirt bottles, I save the ones that come in my hair dye (shhh! Don’t tell!), but you can buy similar ones at a beauty supply store. Ketchup and mustard containers work all right, but the holes are so big you get too much liquid for fine color control.
What is a healing doll?
A healing doll is made with the intention of healing the maker or the receiver. You can choose colors, crystals, herbs and potpourri that are said to help with certain conditions. You can add charms of significance, or use special fabrics. A mourning doll can be made with the loved one’s old clothing, perhaps a lock of hair, and a favorite piece of jewelry. A fertility doll could be made with baby-print fabric. Go with your first instincts when choosing what to use!
If you are making a doll for a friend, either pick your colors according to the table later in these instructions, or ask your friend what colors she’d prefer. It is said that we are drawn to the colors we need for balance. For fun, make yourself a doll with whatever colors and crystals grab your eye. (Warning, this method can be hazardous to your wallet!) Then read through the charts to see what your choices signify. How does that correspond with your life right now? Do you see some old wounds appearing in your choices?
1. Gather everything together for your sewing project.
2. Prewash fabric to remove sizing.
3. Trace pattern onto template cardboard or plastic. Cut just INSIDE the line you drew – you will be cutting the line off. This is necessary to keep the sizing correct, so the arms and legs will turn properly.
4. With pencil, tailor’s chalk, or disappearing marker, trace around template on wrong side of folded fabric.
5. Stitch along traced line, leaving open where shown.
6. Trim close to stitching line with pinking shears leaving ¼” seam allowance at opening, OR cut out leaving 1/8″ seam allowance (1/4″ at opening) and clip curves.
7. Turn right side out and stuff firmly. If desired, add a muslin packet filled with potpourri or herbs of your choice, making sure that stuffing is between packet and doll body all around. Ladder stitch opening closed
8. Separate wool into 6 or 8 locks. Find the cut end of each lock — usually the wider end. Tie a knot close to the end of cut end of locks. (note: if using yarn or colored doll hair, add hair after doll is dyed and dry.)
9. Glue or sew knots along seam on top of head. Make the hair stand up on end if you want a wild look, or lay the hair so it falls down the back.

1o. Get your sewn doll and other supplies for this sewing project together (full list of supplies in part one).
11. Fill a squirt or spray bottle with ¼” cup water, 1 Tablespoon vinegar and 2 or more packets of flavored drink mix. Shake well until mix dissolves. Fill one bottle for each color desired.
12. For soft, blended colors, wet doll with lukewarm water before dying. Leaving the doll dry will give more definition to the colors.

13. Lay doll on plastic sheet (trash can liner) in a safe place, or lay doll in the bottom of your bathtub. Fan the hair upward so you can dye it, too.
14. Now, have a blast! Squirt, spray, stand back and look, then squirt and spray some more! The wool will probably require more dye to get the same color. When you are satisfied with the color, rinse in lukewarm water until water runs clear.
15. Set doll aside in a warm place to dry.
16. When doll is dry, add crystals, beads, ribbons, lace, etc. If desired you can add a simple face, or use markers to enhance the design of the fabric.
17. Sign and date your doll!

18. At this point, you can follow your own beliefs before giving away the doll. You might say a prayer, or picture the receiver being free of sorrow, illness, or whatever end result you are hoping for. You can add a hang tag or card with a poem or prayer with your wishes. If the doll was for yourself, many times just the making of the doll, the thoughts and memories experienced while working on the doll, is enough to begin your healing.
